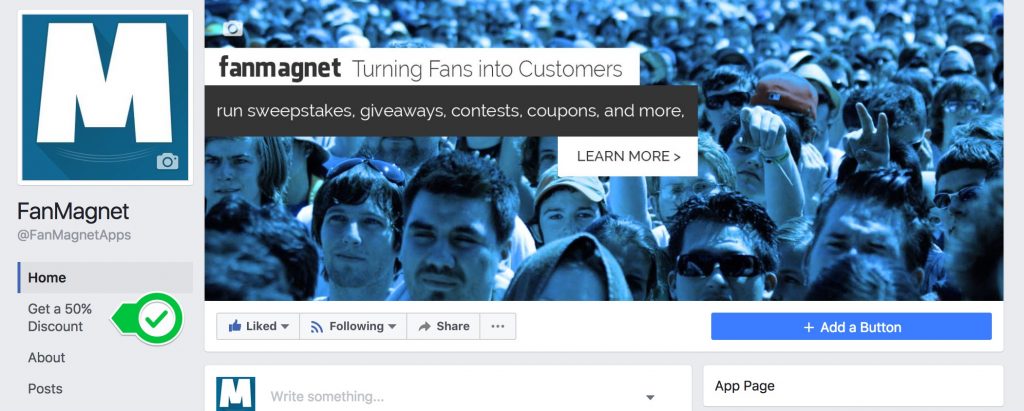
Note that this process is only how it works now; a Facebook update can change it at any time. If it changes, let me know, and I will edit this section accordingly.
We will learn how to change the order of your tabs in order to give your app more visibility and how to re-name your FanMagnet app from Exclusive to something more related to your Campaign, like, “Get 50% Off“
Step 1.
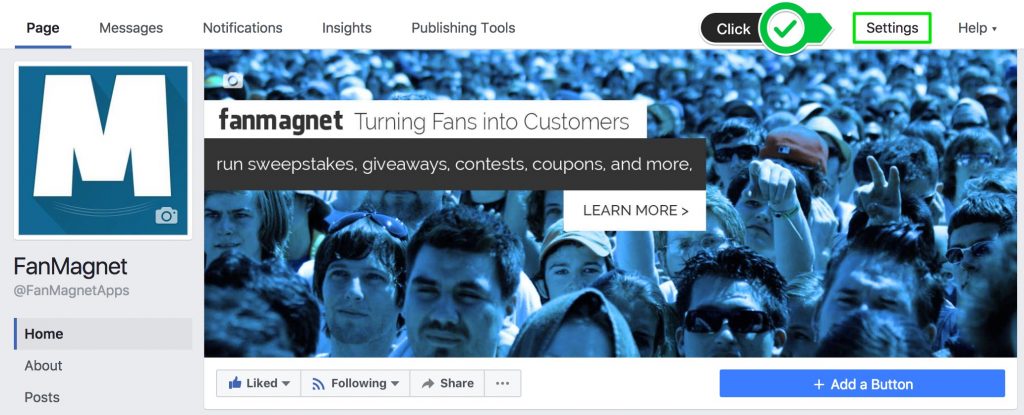
Click the Settings button in the top-right corner of your fanpage
Step 2.
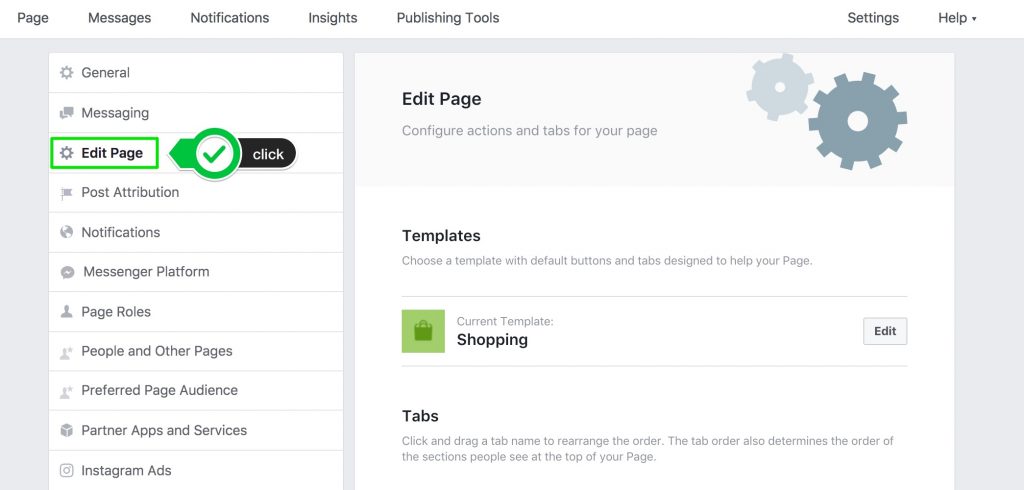
Click the Edit Page button in the menu on the right of your setting’s page
Step 3.
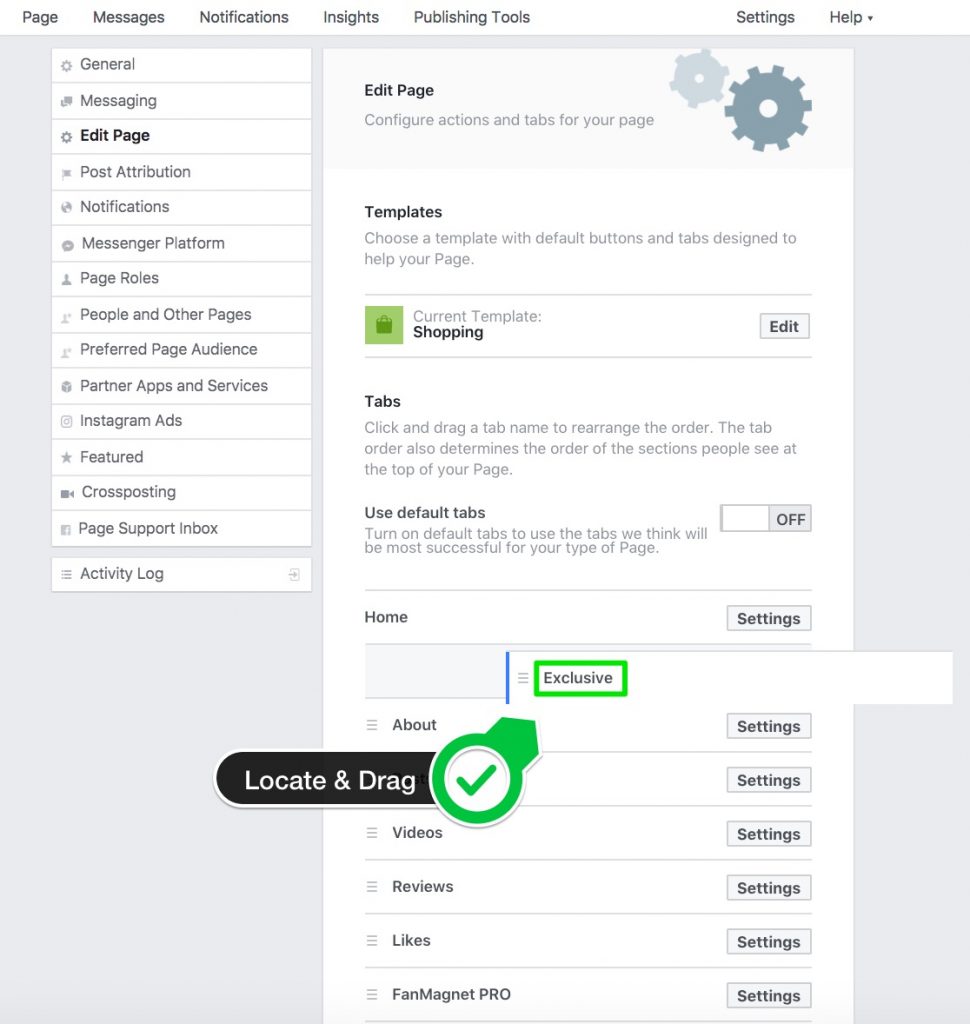
On the right side of your setting’s page, scroll down and look for the Tab you need to move, in this case, we are going to move the FanMagnet app Tab.
Now, Click on the tab’s name and drag your FanMagnet app to move it, we recommend you drag it to the top just below Home.
Step 4.
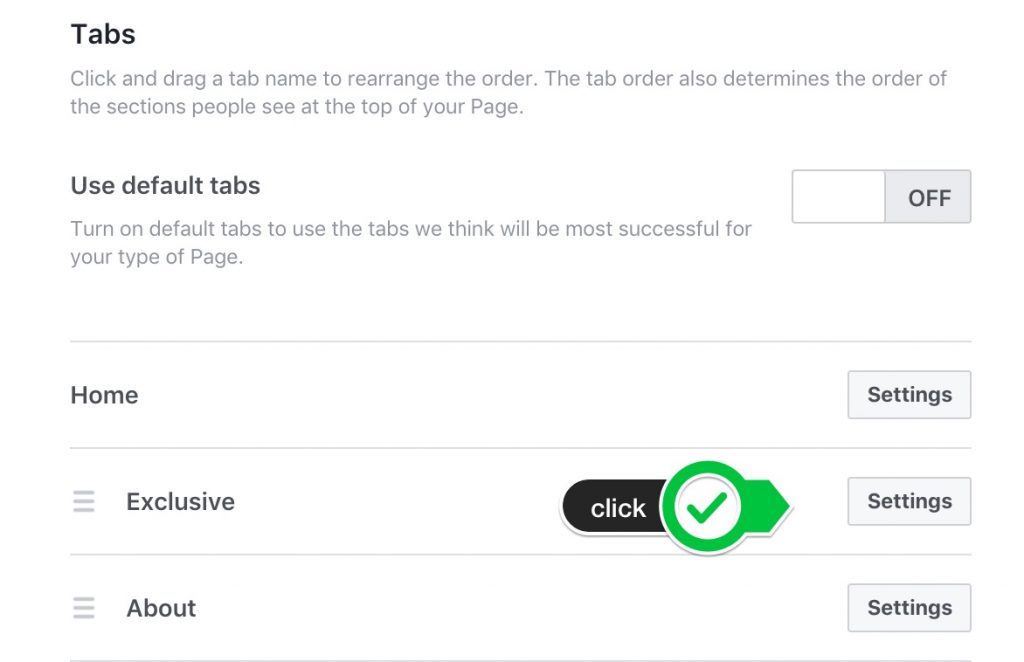
While we are here, let’s change the name of your tab for something that relates to the campaign you are planning to run. Let’s change it to ” Get a 50% Discount “
Click on the Settings button beside the tab you want to Re-Name.
Step 5.
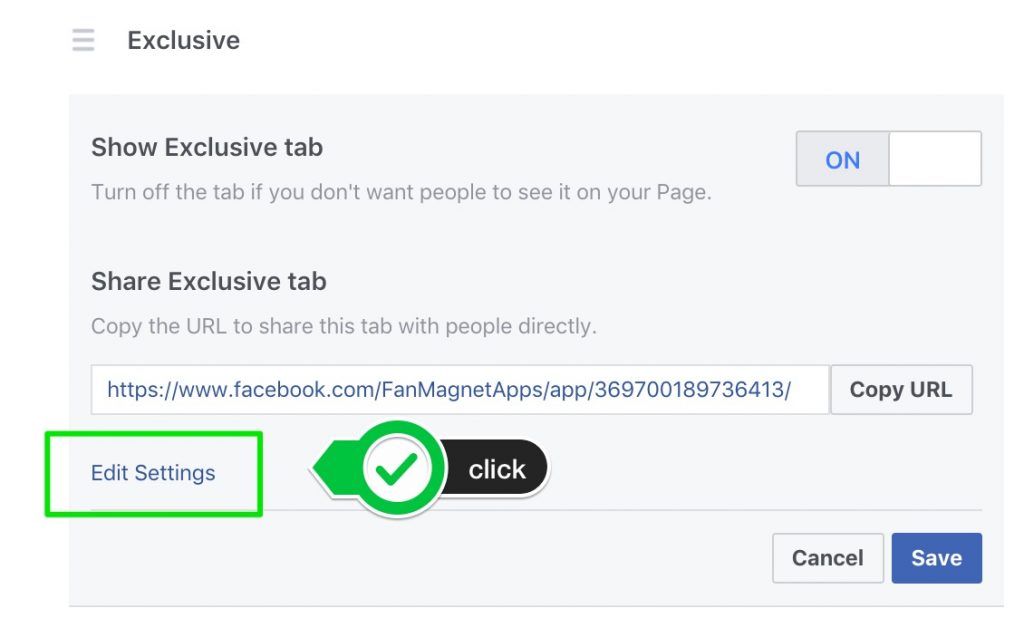
Click on the Edit Settings Link at the bottom-left corner
Step 6.
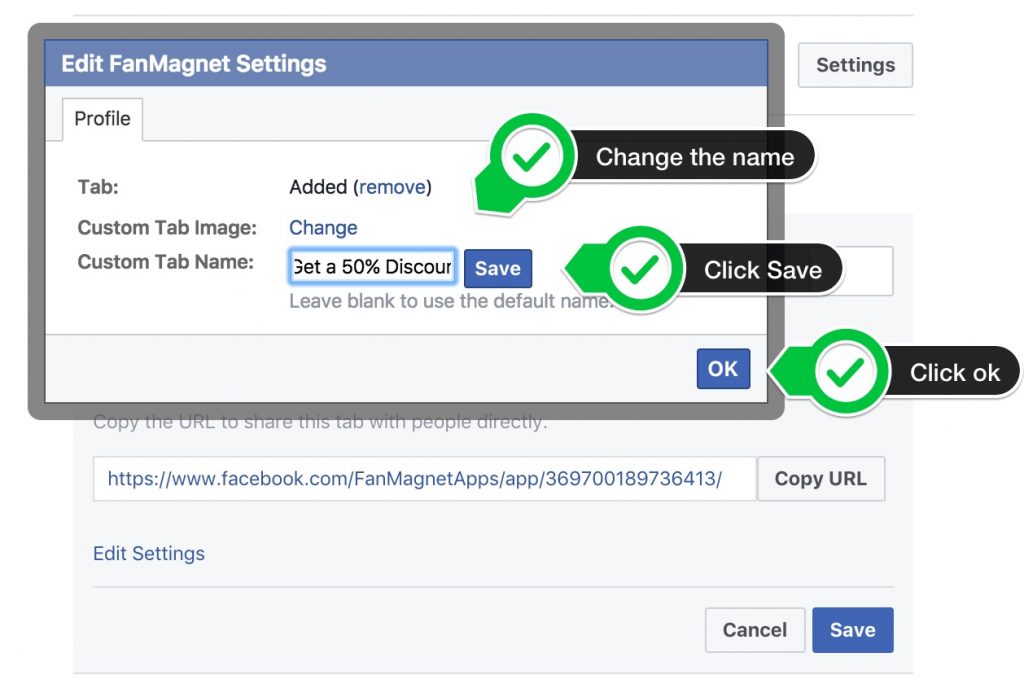
Under Custom Tab Name, type your custom name, in this case, Get a 50% Discount, click the Save button, and then click the ok button.
Step 7.
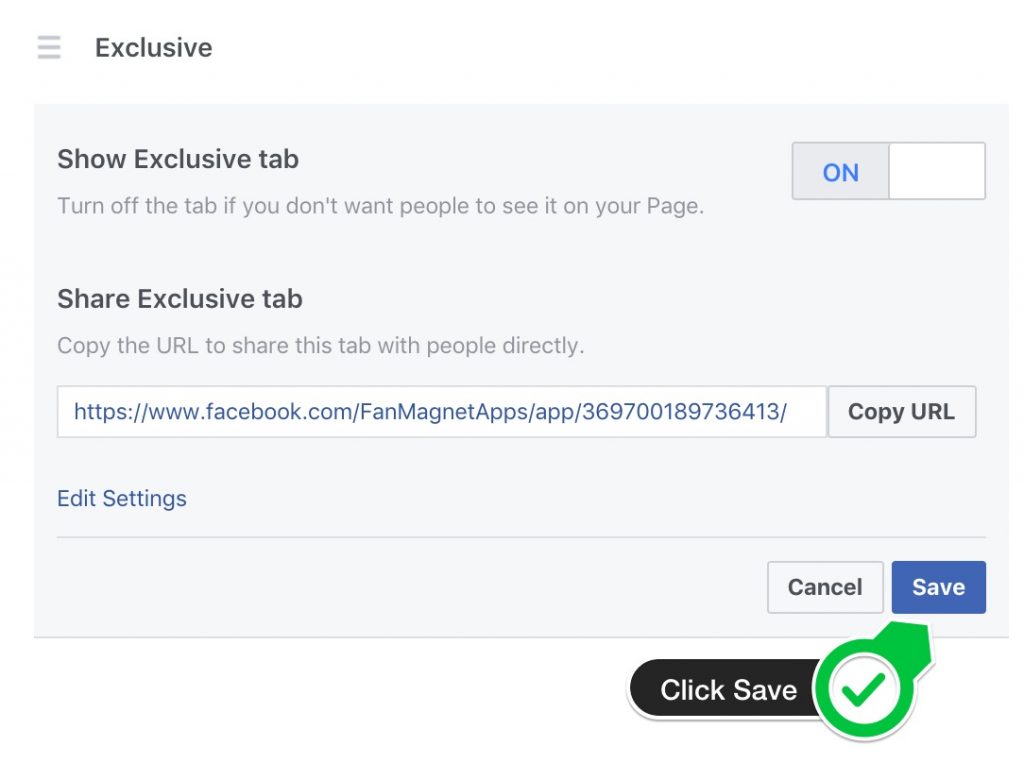
Click the Save button.
That’s it! Now go to your Page and let’s take a look at the final results.
